Configuring WebStorm
The student server was recently moved to a new address ddfullstack.cloud
Important Links
These are important links are mentioned in the video:
- Apply for a WebStorm Student License: https://www.jetbrains.com/student
- JetBrains website: https://www.jetbrains.com/
WebStorm's New User Interface
Your version of WebStorm may look different. The Classic UI (user interface) uses clickable words. The New UI uses clickable icons. The above video was recorded using the Classic UI with words instead of icons. You can do this step of the prework using either user interface. Here's a link to instructions to switch between the two user interfaces and explanations of the differences: https://www.jetbrains.com/help/webstorm/new-ui.html
Steps for Creating a New Project
Create Project on Github
- Go to github and click the green button to create a New Repository.
- Name your repository (usually the same as your project name).
- Check the box to create a README file.
- Select the Apache License 2.0.
- Click the button at the bottom to create the repository.
- Click the button to create a new file.
- Name the file .gitignore
- Put inside the file
.DS_Store
.idea - Enter a commit message "created .gitignore".
- Click the create file button.
Import Repository to WebStorm
Once the repository has been created, it can be imported to WebStorm. To import it:
- Copy the repository's SSH URL by selecting the SSH URL from SSH Clone URL in the right nav of the repository. If this reads HTTPS Clone URL, change it to SSH before copying by clicking the SSH link.
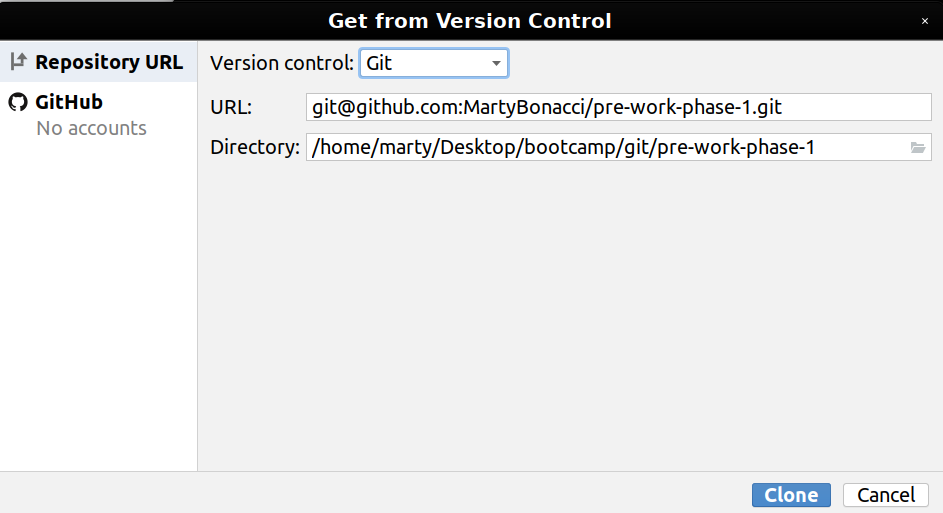
- Select Checkout from Version Control and select the git option (NOT the GitHub option) as seen in Figure 1.
- Paste the repository URL into the Git Repository URL, as shown in Figure 2.
- Click Test to ensure the URL is correct.
- Click Clone.
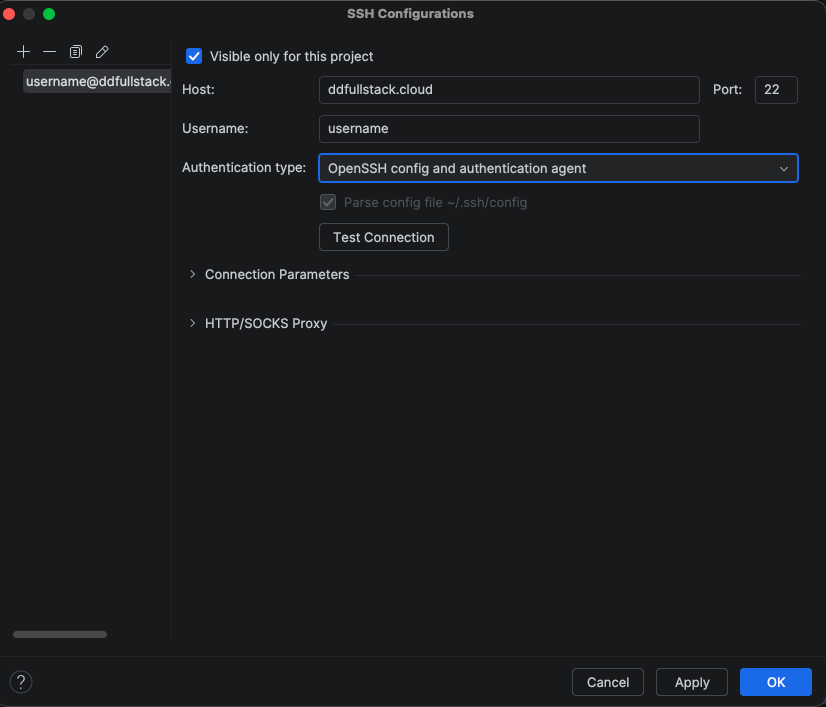
Create a Deployment
A deployment is a place on the web server where the project files will be deployed and tested. This directory will be synchronized with the web server. You will make a new deployment for each project. To deploy it:
- Tools → Deployment → Configuration
- Click the '+' symbol
- Select SFTP and name the deployment after the server.
- For "New server name:" enter the project name (the same as you named it on github).
- Enter the following values for the next screen. Replace username and prework with your username and project name, respectively:
- Visible only for this project: checked
- Type: SFTP
- SSH Configuration: username@ddfullstack.cloud
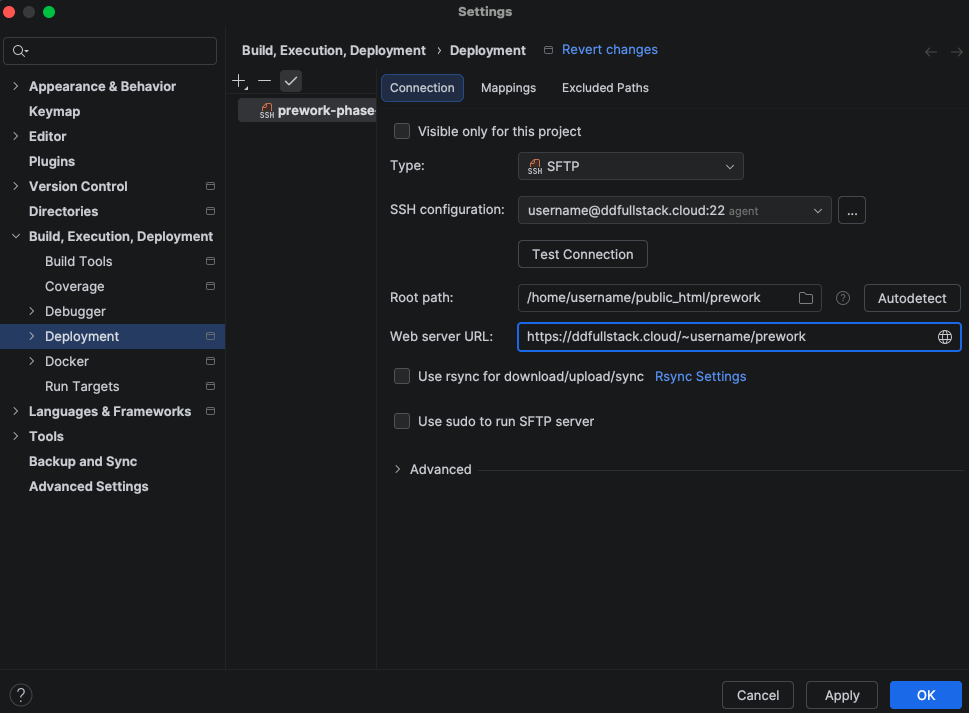
- Root Path: /home/username/public_html/prework
- Web server root URL: https://ddfullstack.cloud/~username/prework
- A full example of this screen is in Figure 3.
- Click the Mappings tab.
- Enter a slash (/) in the deployment path.
- Click OK.
- Connect to SSH using the Terminal
- Enter the following commands into the SSH session:
- cd public_html
- mkdir prework
- exit
Assignment: Slack us your info
Once you are finished with this info, you can complete the assignment at the end of Phase I by sending the instructor team a Slack message with your URLs. Check out the Prework Phase I page for details.